Wednesday, December 21, 2016

Easier to select Rate Plans that Taxes and Fees apply to

Now it is easier to select the Rate Plan(s) that Taxes and Fees apply to.

In the settings screen for both, there is a new section to select the applicable Rate Plan(s):


Previously it was necessary to go back to the Rate Plan settings to select taxes and fees. This option is still available, but now rate plans can also be selected from the settings for taxes and fees.

Selecting taxes and fees from within the Rate Plan settings:

Friday, December 9, 2016

New Feature: Bookkeeping

Under the Reservation Manager tab there is now an option for Bookkeeping. The idea with this feature is to make a simple place to enter income and expenses, and then to be able to sort and group by categories.

The feature starts out empty, but will grow as you add Transaction Types, who you received payments from or sent payments to, and categories for these payments.

Once you have data in the system, the interesting part is being able to easily sort and group this data to get a good idea of how your money is flowing.

To get started, watch our short introduction video about this feature:


Also, we have a longer, more in depth video about bookkeeping.


Tuesday, October 11, 2016

Under Development: Update to system look and feel

We are working on an option to be able to select from a variety of themes to change look and feel of the system. Eventually it will be possible to customize these themes as well, very similar to how we do customization of themes for the public reservation pages.

Currently we have the first theme in development, a theme to update the look of the system. It will also be possible to remain with the current look and feel by setting the theme to "Classic". Although this feature is still in development, meaning anything related to it could change at any time (especially colors and layout options), we would welcome feedback about this feature. Our first theme makes the font sizes a bit bigger, uses a different font, and changes some colors.

To select a theme go to the Settings tab, Users.


This is an example of what the new theme currently looks like:


We also are working to re-do the layout of many of the pages so that they are cleaner and more functional to use with small screens (mobile devices). The first three pages that have been converted are under the Properties tab - Rate Adjustments, Fees, and Taxes.

Monday, October 3, 2016

Option to force new login for an account user

An option has been added to force users to re-login to the system. This is useful after changing a user's permissions or password. Because these changes only take affect when a user logs in, it is now possible to force a user to log into the system, even if they are already logged in or had enabled the "keep me logged in" feature.

Just go to the Settings tab, Users, and select a user. At the bottom check the box "Force new login" and save.


Once this box has been checked and saved, the next time the user loads the Reservation Details page, they will be requested to re-login. Only Admin level users will see this new option.


We have opted to put this check as part of the Reservation Details page, rather than querying the database for this value every time every page loads in the system in order to keep things running as efficiently as possible.

Monday, September 19, 2016

HTML Editor Added to Email Templates

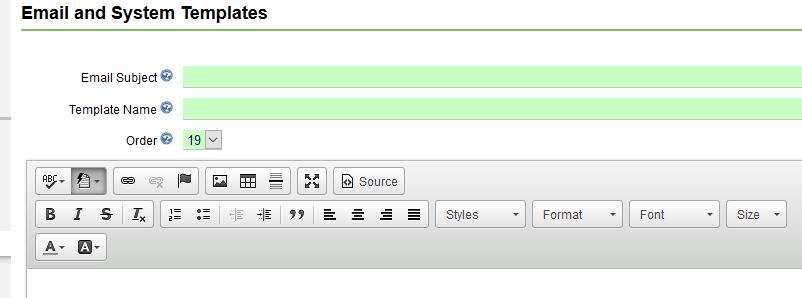
When creating email templates within ReservationKey, we now have an HTML editor to make the job of formatting the template easier. Now it is easier to add more style to emails that go out to your guests as part of their reservation. With this editor it is easy to change font size, colors, alignment, and much more.


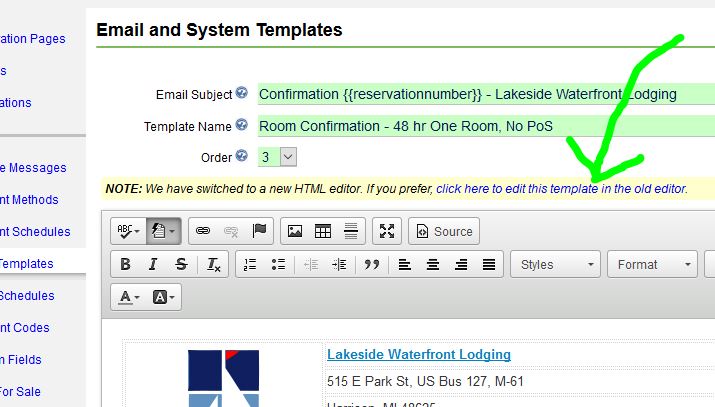
Existing templates will automatically use the new editor, but because there may be some formatting issues with converting existing templates into HTML in the new editor, we have an option to continue using the old editor. The main formatting issues are extra spaces being added. You can manually remove those spaces in the new editor, or just use the old editor for existing templates. For new templates, we only show the new editor.


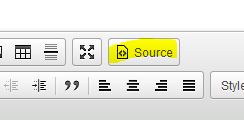
It is easy to view the HTML source by clicking the Source button (to make further fixes, if needed):


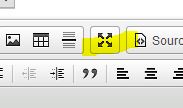
Edit in full screen mode by clicking the expand button:


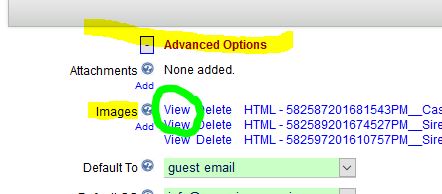
To upload an image, first upload as before, under the Advanced Options section. But now, it is necessary to know the URL to the image. So just click the View link which opens the image in a new tab, and copy the URL from the address bar. Or right click on View and select copy URL from your browser options.


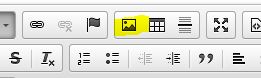
Then, click the image icon in the HTML editor.


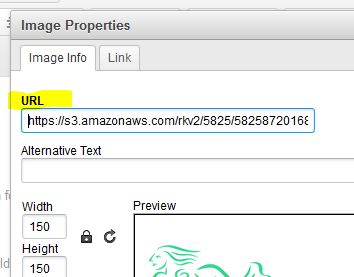
And paste the URL into the URL field.


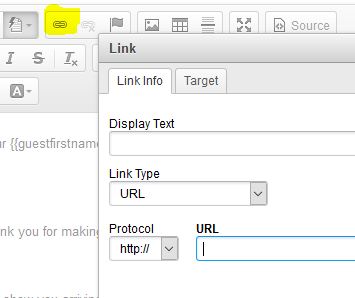
Adding a link is easy. Just click the Link icon:


We hope you find this new editor useful. We welcome any feedback about this.

Monday, June 13, 2016

Update to Google Analytics Tracking Options

Today we have added an option to make things easier to get started with Google Universal Analytics. Now, instead of having to figure out what code to paste into our tracking field, you can select Google Universal Analytics ID. Then you just enter your ID and we will take that ID and build the tracking code automatically. This code is included on both the reservation pages and the final confirmation page. The final confirmation page we build out the code more, to include details about the reservation (such as reservation ID, price, items for sale) so that the sale can be tracked in the e-commerce section of Google Analytics.


We have left an option for entering in the complete code yourself, in case someone wants to enter code other than Google, or they want to customize the code.


The above code is what we build when just the Analytics ID is used. When your Google Analytics account is set up properly you can now see lots of data including Acquisition data and E-Commerce data. Below are some screenshots from one of our users who has his account set up to use this feature.


To enable e-commerce tracking, follow these steps (source: https://support.google.com/analytics/answer/1009612):

You need to enable Ecommerce reporting in the view in which you want to see the data.

Sign in to your Analytics account.
Navigate to the desired account, property and view.
In the VIEW column, select Ecommerce Settings.
Click the Enable Ecommerce toggle ON.
Optional: Click the Enable Related Products toggle ON.
Click Next step.
Click Submit.

Also, we continue to support the older style of Google Analytics. If the tracking code you paste into the field for this in the Reservation Page settings contains "analytics.js" then we switch to the new method. Otherwise we use "ga.js" which is the old style.

Monday, May 9, 2016

Break Address Field into Multiple Fields

A new option has been added in Settings tab, Preferences to now be able to show multiple fields for the address instead of just one text box.

Go to Settings Tab, Preferences and set this option:


In case you don't need three fields for phone numbers we've also now added an option to hide 2 of the fields internally.


Re the fields not showing in the public reservation pages:

If you want to make the address fields required, or otherwise change them, review the field settings in your reservation page settings.


Re the new merge codes:

Now {{guestaddress}} will include all the address fields. This way no changes to templates will be needed. If someone wants to format the address per their own requirements (IE they don't want to use the USA standard formatting of addresses) then they can use the new merge codes to make their own address format within their templates. Otherwise, the address is formatted like this:

Street Address
City, State ZIP
Country

There is a new merge code to pull just the street address - {{guestaddress_street}} . Although {{guestaddress}} will continue to pull whatever was entered into the original address big field (or if changing to multiple fields, whatever is entered in the street address field PLUS all the other address fields. The new merge codes in email templates will only appear once the preference to use multiple address fields is set.

The merge codes relating to addresses are:

{{guestaddress}}
{{guestaddress_street}}
{{guestcity}}
{{gueststate}}
{{guestzip}}
{{guestcountry}}


Guests tab search by Address:

If multiple address fields are enabled, it is now possible to search on these fields in the Guests tab. All fields will show if the address fields are enabled; otherwise just an option for Address.


Tuesday, February 9, 2016

New Feature to Show Minimum Stay Requirements on Internal Calendar

We now have an option to show minimum stay requirements directly on the internal calendar grid. This makes it easy to see what days have a minimum stay requirement, which should be especially helpful as a reminder if your minimums change throughout the year. On any days with a minimum stay more than 1 night, the number of nights now shows as a small orange number next to the price.


This number is calculated based on the Rate Rules, and Rate Adjustments. Any setting in the Rate Adjustments overrides what is set in a Rate Rule. Currently we show the min nights required only. We are not changing the minimum if the setting "reduce if it can't be met" is set. This may be a future enhancement to this feature.

It is possible to add a reservation which does not meet the minimum, but now a warning box will ask you to confirm that you want to continue.


By default we have enabled both the visual cue of the numbers on the grid and the confirmation box, but in case these are not desired, both can be turned off. This is a setting under the Settings tab, Preferences.


If you are not seeing these new features, reload the system by pressing Ctrl-R or Option-R.

Saturday, January 30, 2016

New Option For Adding/Removing Emails to Queue

Now it is easy to add new email templates to the queue for existing reservations. This is useful if you have created a new email template and you want it to be added to all upcoming reservations. Previously it was necessary to go through each reservation one at a time and add the new message.

To use this feature, go to Website tab, Email Schedules, and click "Manage Queue" at the top right.


Then just follow the steps shown.


This can also be used to remove templates from the queue, in case you decide you no longer want to send out a particular message. NOTE - this will only remove emails added after this feature was developed. With the development of this feature we are now saving the template ID number with messages saved into the queue, so now we can update and remove based on the ID number (previously we matched based on the title being exactly the same). So, the remove feature will only remove templates which match the ID number that is saved in the database. Because prior to this feature we were not saving ID numbers, those templates would still need to be manually removed.


Related to this, since we are now saving ID numbers with messages saved into the email queue, now when updating an email template, we will match based on the ID number, no longer the title. This will work well for messages added to the queue subsequent to the development of this feature. For messages that were added prior to this feature, those messages will need to be manually updated.

This is in the Website tab, Email Templates, at the bottom of the edit template page: